Here's my list so far of DIY's planned for our wedding.... I'll check them off and post pictures as I've completed them.
STD's & envelopes
Invites
envelopes (for both responses and Invites) They'll be lined and printed on.
Bell ornaments for christmas tree
Coasters
Cocktail napkins
OOT baskets
Programs
Bridesmaid's gifts & bags
Groomsmen gifts
Guest book- Calendar for everyone to sign on their birthday.
Centerpieces
Table linens
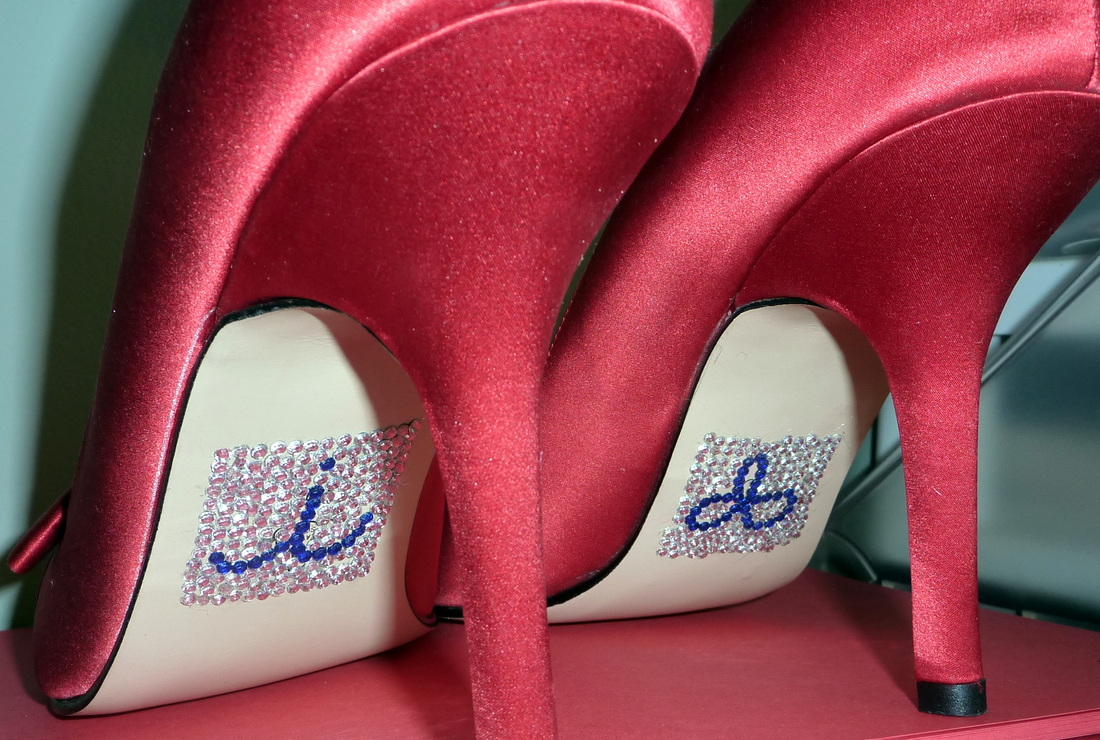
Painting the soles of my shoes & 'I Do' in rhinestones.
Possibly dying my crinny... (FAIL)
Champagne flutes
Aisle Runner
Hangers
Card box
Table hanger for Sweetheart table
Parasol
Mr & Mrs. Snowflake seat hangers
Phew, I have my hands full over the next year!
STD's & envelopes
Invites
envelopes (for both responses and Invites) They'll be lined and printed on.
Bell ornaments for christmas tree
Coasters
Cocktail napkins
OOT baskets
Programs
Bridesmaid's gifts & bags
Groomsmen gifts
Guest book- Calendar for everyone to sign on their birthday.
Centerpieces
Table linens
Painting the soles of my shoes & 'I Do' in rhinestones.
Possibly dying my crinny... (FAIL)
Champagne flutes
Aisle Runner
Hangers
Card box
Table hanger for Sweetheart table
Parasol
Mr & Mrs. Snowflake seat hangers
Phew, I have my hands full over the next year!
The coasters!
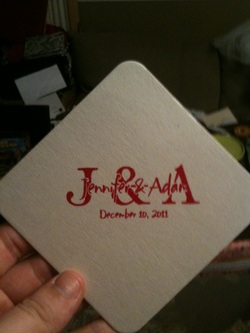
I ordered the cardstock off of Ebay (dogluver1313), and the stamp off of Ebay as well (from Loongchai74, and umm... yeah. Apparently I'm an Ebay junkie... I got the ink (basketracer6) and the heating tool from Ebay as well. (I used Stazon ink in Blazing red) Super easy. Lay out 10 coasters, rub them all down with a dryer sheet, ink the stamp, stamp, repeat on the next 9 coasters. Once they were all inked, I then coated them all in embossing powder, dusted 'em off, and heated 'em up. All done!
The cocktail napkins
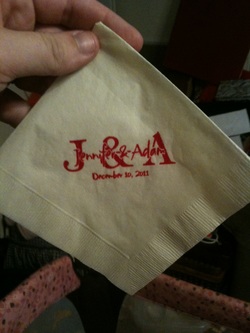
I bought 3 packs of 48 napkins at The Christmas Tree Shoppes... I love that store. ($.98 a package!) Did the exact same thing for these as I did for the coasters. Super easy!
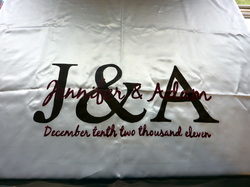
The aisle runner
So, while this wasn't the easiest thing I tackled, it certainly wasn't the hardest. I started off by making the monogram in microsoft word. I then printed it out (Don't ask me how, I can't remember for the life of me) and taped it together. Next, I taped it to the table so it wouldn't shift, and lined up the runner with the paper to make it straight. (Important step.) I grabbed my paints, as shown in the first picture, and also textile medium. This made it easier to put on the fabric- it also makes it permanent so it won't flake off as I'm walking down the aisle. The second picture shows the brushes I used. Next, I grabbed a pencil and started tracing the letters. Be patient, it takes a while. Make sure you have good lighting, (I had a ceiling fan right over my head) that way you can see the letters you've traced. (Picture number 3 & 4) Next, I untaped the monogram from the table, (picture 5) and put wax paper underneath so it didn't bleed through. (very important!!)
What comes next? Painting!! I highly recommend getting the larger spaces first, and moving from left to right. (If you're right handed. If you're a lefty, go the opposite.) Make sure you mix the textile medium with the paint as directed on the bottle! I let that dry for a few minutes, (ceiling fan on full blast, anyone?) and then hit the smaller letters, mixing the textile medium with the red and moving from left to right. (picture 7) Guess what? 3 hours later, and I'm done!! :) (Pictures 8 & 9) I let it dry, then took the wax paper off very carefully. Once the back dried, I grabbed some more wax paper and rolled it up underneath the monogram so it didn't bleed. Woohoo! Now I'm just waiting till we start our premarital counceling so I can measure the aisle and paint the other side.
What comes next? Painting!! I highly recommend getting the larger spaces first, and moving from left to right. (If you're right handed. If you're a lefty, go the opposite.) Make sure you mix the textile medium with the paint as directed on the bottle! I let that dry for a few minutes, (ceiling fan on full blast, anyone?) and then hit the smaller letters, mixing the textile medium with the red and moving from left to right. (picture 7) Guess what? 3 hours later, and I'm done!! :) (Pictures 8 & 9) I let it dry, then took the wax paper off very carefully. Once the back dried, I grabbed some more wax paper and rolled it up underneath the monogram so it didn't bleed. Woohoo! Now I'm just waiting till we start our premarital counceling so I can measure the aisle and paint the other side.


This will go on the other end of the aisle runner.
Table hanger for the Sweetheart table.
So, since I was able to paint the aisle runner, I decided I wanted to try this. I grabbed a piece of satin, (I believe its baroque, but I could be wrong. it's a thinner satin.) I followed the directions exactly as I did for the aisle runner. Exactly. It's a little harder to trace- good lighting is crucial for this. Next, I'll be getting red satin and 'framing' it, finishing off the edges. It'll be hung on the front of our sweetheart table.
The Centerpieces
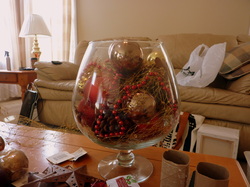
Here's a mock up of what we're going for. It is by no means perfect, or exactly what it will look like. But, any feedback is appreciated. :)


The shoes. <3
The hangers for the bridesmaids & I. <3


How to-
Super easy. I went to etsy and printed out a picture that had most of the letters done on it so I could mimic them. I used the two types of pliers as shown in the first picture- the pink handled ones were great for squeezing together the loops in the letters like the T,M,N... and it is great for a 90 degree angle. The one with the round ends was great for the loops like on the r, y, etc. The first thing, was to center the name on the hanger- I had to leave a good 8 inches on the beginning end just to make sure I wouldn't make it too close to the left side while I was curling the wire. After finishing the name, (2nd picture) I took the hanger and marked where I wanted the wire to sit. Once I did this, I used a cordless drill and bit to drill a hole in the hanger. First, perpendicular to the hanger, and then after less than 5 rotations of the bit, I turned it to a 45 degree angle so the wire would hold properly. Once this was done, the wires just slid in and held. I didn't glue them, just in case I got picky and decided to re-do any of the names. Then, I tied a bow around the hook on the top, and voila! Pretty freakin' easy. :)
Super easy. I went to etsy and printed out a picture that had most of the letters done on it so I could mimic them. I used the two types of pliers as shown in the first picture- the pink handled ones were great for squeezing together the loops in the letters like the T,M,N... and it is great for a 90 degree angle. The one with the round ends was great for the loops like on the r, y, etc. The first thing, was to center the name on the hanger- I had to leave a good 8 inches on the beginning end just to make sure I wouldn't make it too close to the left side while I was curling the wire. After finishing the name, (2nd picture) I took the hanger and marked where I wanted the wire to sit. Once I did this, I used a cordless drill and bit to drill a hole in the hanger. First, perpendicular to the hanger, and then after less than 5 rotations of the bit, I turned it to a 45 degree angle so the wire would hold properly. Once this was done, the wires just slid in and held. I didn't glue them, just in case I got picky and decided to re-do any of the names. Then, I tied a bow around the hook on the top, and voila! Pretty freakin' easy. :)
Crinoline- Fail.
Okay, so not so much as a fail, as it just didn't come out how I wanted it to. Probably operator error. My intention was to make it red. Like, scarlet red. Pretty much like the color of the title of this paragraph. So, I get two bottles of Rit dye in Scarlet, (picture 3) and a large tub (picture 2) to mix the crinny in. I started out by running the hottest water possible, then putting the crinny in the tub while it was filling, to make sure A. it was wet and B. there wasn't a huge water displacement once I put the crinny in. All I needed was red dye everywhere, right? Well, I put both bottles in the tub, mixed it up, and put the crinny in. (P.S.- I had gloves on. You NEED gloves. Trust me. My arms are pink because the gloves I had weren't tall enough.) So, I mix it. And mix it. And mix it. 45 minutes later, I rinse it out with cold water, and begin scrubbing out the bath tub which now looks like a prop in Psycho. I look at my crinny... It turned out pink. FML.
So, after about an hour of scrubbing out the bathtub, I go outside, spray down the crinny with the garden hose (at full blast) and hang it out to dry. I'll be putting it in the washer later on. It's still pink. Gorgeous, just not what I was looking for. So, if anyone needs to buy a pink crinoline, one size fits all, (I'm a 16- it fits fine. My friend is a 2. It fits her perfectly.) it's for sale. Just send me an email at [email protected] or page me on The Knot on either the DIY board, the December 2011 board or the Philly Board. Enjoy the pictures.
**Update** I tried to re-dye it outside, with boiling water, two packets of I-Dye Poly, and still... Pink. So, then I tried to take the color out so I didn't have to wear a pink crinoline. Welp, you guessed it. It didn't work. So, I took an old crinoline I found, revamped it to make it a 'one size fits all' type deal, and now I'm good. I just have a spare pink crinoline lying around.


The Parasol
So, the next thing I decided to tackle was the parasol. You've seen the conventional parasol pictures, with the 'Thank you' or the 'Just Married' on it and the new Mr. & Mrs. kissing or something equally as adorable. Well, I wanted to do this. Except I wasn't spending $50 on one on Etsy. Now, I own a shop on etsy, so I know how frustrating it can be when people copy you. Tough cookies. :) This was easy, but not that easy. First, I printed out the words I wanted. This included jacking the size way up, and printing them out in random pieces of paper. Then, cutting the paper, taping it together the way I wanted it, and finally, taping it to the inside of the parasol. Word to the wise- don't use cheap tape from the dollar store. It just falls off the thin paper. After 20 minutes of repositioning and retaping the letters, I figured it was about freakin' time to start tracing the letters. :) I did two umbrellas, by the way. One that said 'Just Married' and one that has our 'theme phrase' on it. "All because two people fell in love". First, I traced the letters. Then, on the 'just married' one, I traced the letters in black pen. This made it a little easier to paint. The other parasol, however, has colored letters, and I didn't want it to look funky, so I left it pencil. Next, I grabbed some paint brushes, and a few paint colors, and I went to town on painting. Once I was done, I left them open for 2 days to dry... and voila! :)


The Cardbox
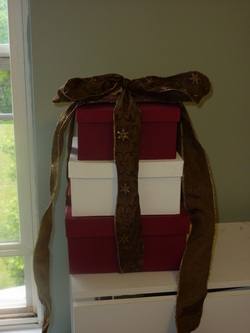
Pretty simple, really. I painted three boxes, (like, 90 times) and put one on top of each other. I then cut out the bottom of the middle box, and the top box, and then the lid on the bottom box and middle box. All to be the same size as the top box. (I think. They might be staggered sizes too.) I used E6000 to glue them together, and tied a pretty ribbon around it. I'm pretty sure the ribbon has to go, as I have to make a slot for the cards to fit into... but that's another story. :) Check back. I'll update it completely.
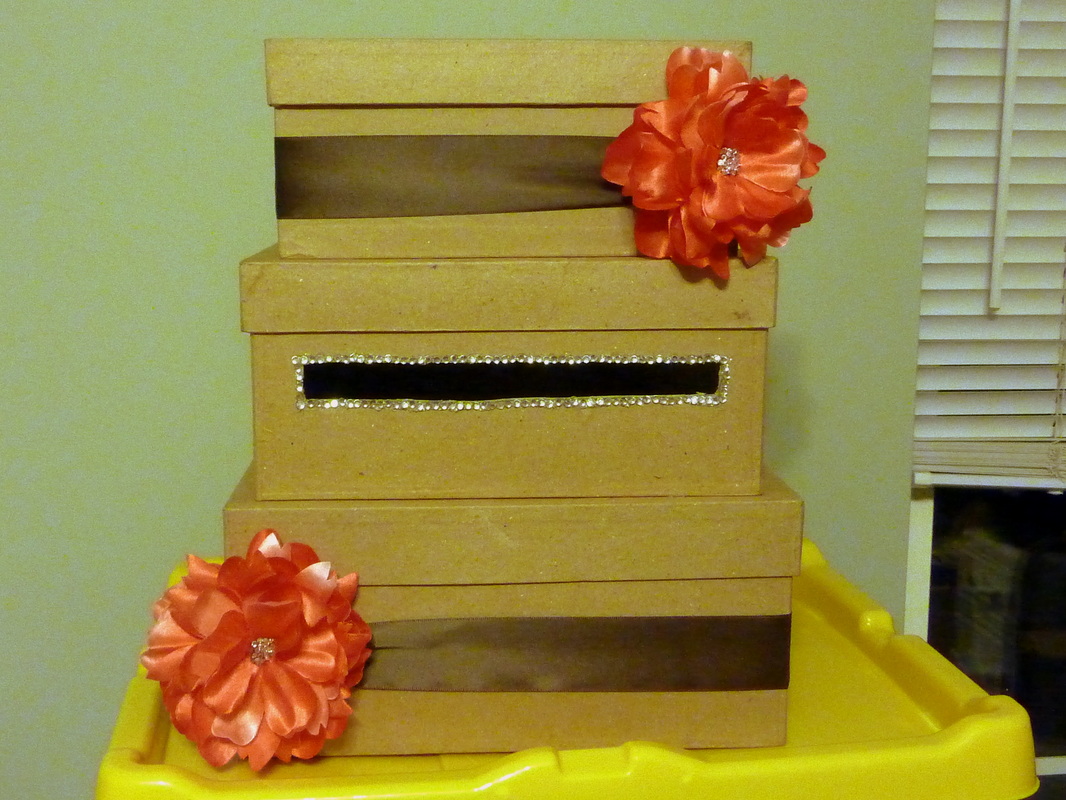
**Update**
I decided I hated my other cardbox, so now I just have three boxes glued together chilling in my closet. I went to Joann Fabrics one day, saw the set of three boxes, and decided to try again with something a little more simple. No paint. Just a hot glue gun, two clip on flowers with some rhinestones I added to the center for a little bling, and two brown ribbons. And some bling around the card slot. So much more simple. And prettier. But that's just my opinion. :)
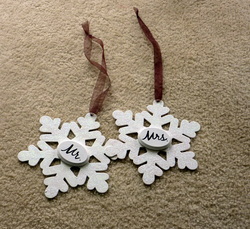
Mr. & Mrs. Snowflake chair hangers.
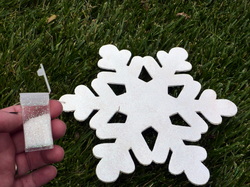
So, these may or may not make it to the wedding. I'm not sure yet if I'll like them. I went to the craft store and picked up these wooden snowflakes and painted them white on both sides. Thsi looked too plain, so I put white glitter on it that looks like snow now on one side. I then got the brilliant idea to get 2 'plaques' (wooden) and paint them white as well, and paint Mr on one, and Mrs. on the other and glue them to the center of the snowflake. Then, I'm planning on changing out the brown cord for a red or brown ribbon and hang it from the back of our chairs.
<-------Here they are not finished yet.
Underneath however, they're done. :)
<-------Here they are not finished yet.
Underneath however, they're done. :)
The Unity Candle
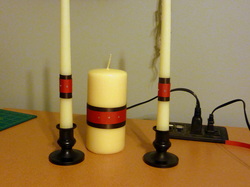
I made these after Joann Fabrics had a sale on candles. They smell like Warm Vanilla Sugar. :) I got two tapers and a pillar candle, brown satin ribbon, (which I already had) red grosgrain ribbon (that I already had) and a few rhinestones. I found the candle holders in the house (yes. in the china cabinet. Don't tell my mom.) They were clear plastic when I started... I spray painted them black and now you can't really tell they're plastic when you look at them in person. I just need to grab a candle holder for the unity candle itself.
The place card holder
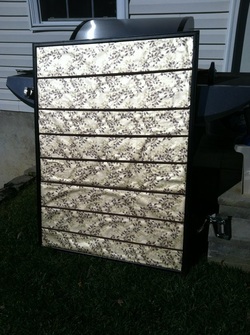
So, I've gotta redo this one and add some more ribbon. And straighter this time. I figure I'll do 12 ribbons across- one for each table. All it is? An old bulletin board I found in the garage. I spray painted the outside black, and then covered the cork with pretty wrapping paper. (that I picked up from Target after Christmas last year. for $.15.) Once I did that, I stapled ribbon across the board. Clearly, I didn't use a level. Ha. You live, you learn.
